Star Wars is seeing a revival starting with The Force Awakens movie. Currently, it is under Disney and it seems that Disney has increased the number of licenses for merchandising. Woe be to collectors but blessings for the rest. We get a lot more variety and choices! One of the iconic vehicles from the new movie is the new X-Wing. Officially, it is a
Incom T-70 X-wing fighter. It seems like an evolutionary upgrade of the
Incom T-65 X-Wing fighter seen in the original trilogy. In the new movie we see the new X-Wing under two paint schemes. The black-orange one flown by Poe Doramon and the blue-white version flown by everyone else. Revell makes both these versions with sound effects. I saw them on Amazon and bought both. Here is the review of the blue-white
Revell SnapTite Build & Play Star Wars Episode 7 Resistance X-wing Fighter.
The standard Revell box opens on its sides. The front shows a dramatic picture of the X-wing coming in low over waters in a surprise attack on Takodana. It says that it is for ages 6+, for skill level 1 (which is the lowest for Revell kits) and takes 1/2 hour to build. It has Action Sounds and is a SnapTite kit (no glue needed).
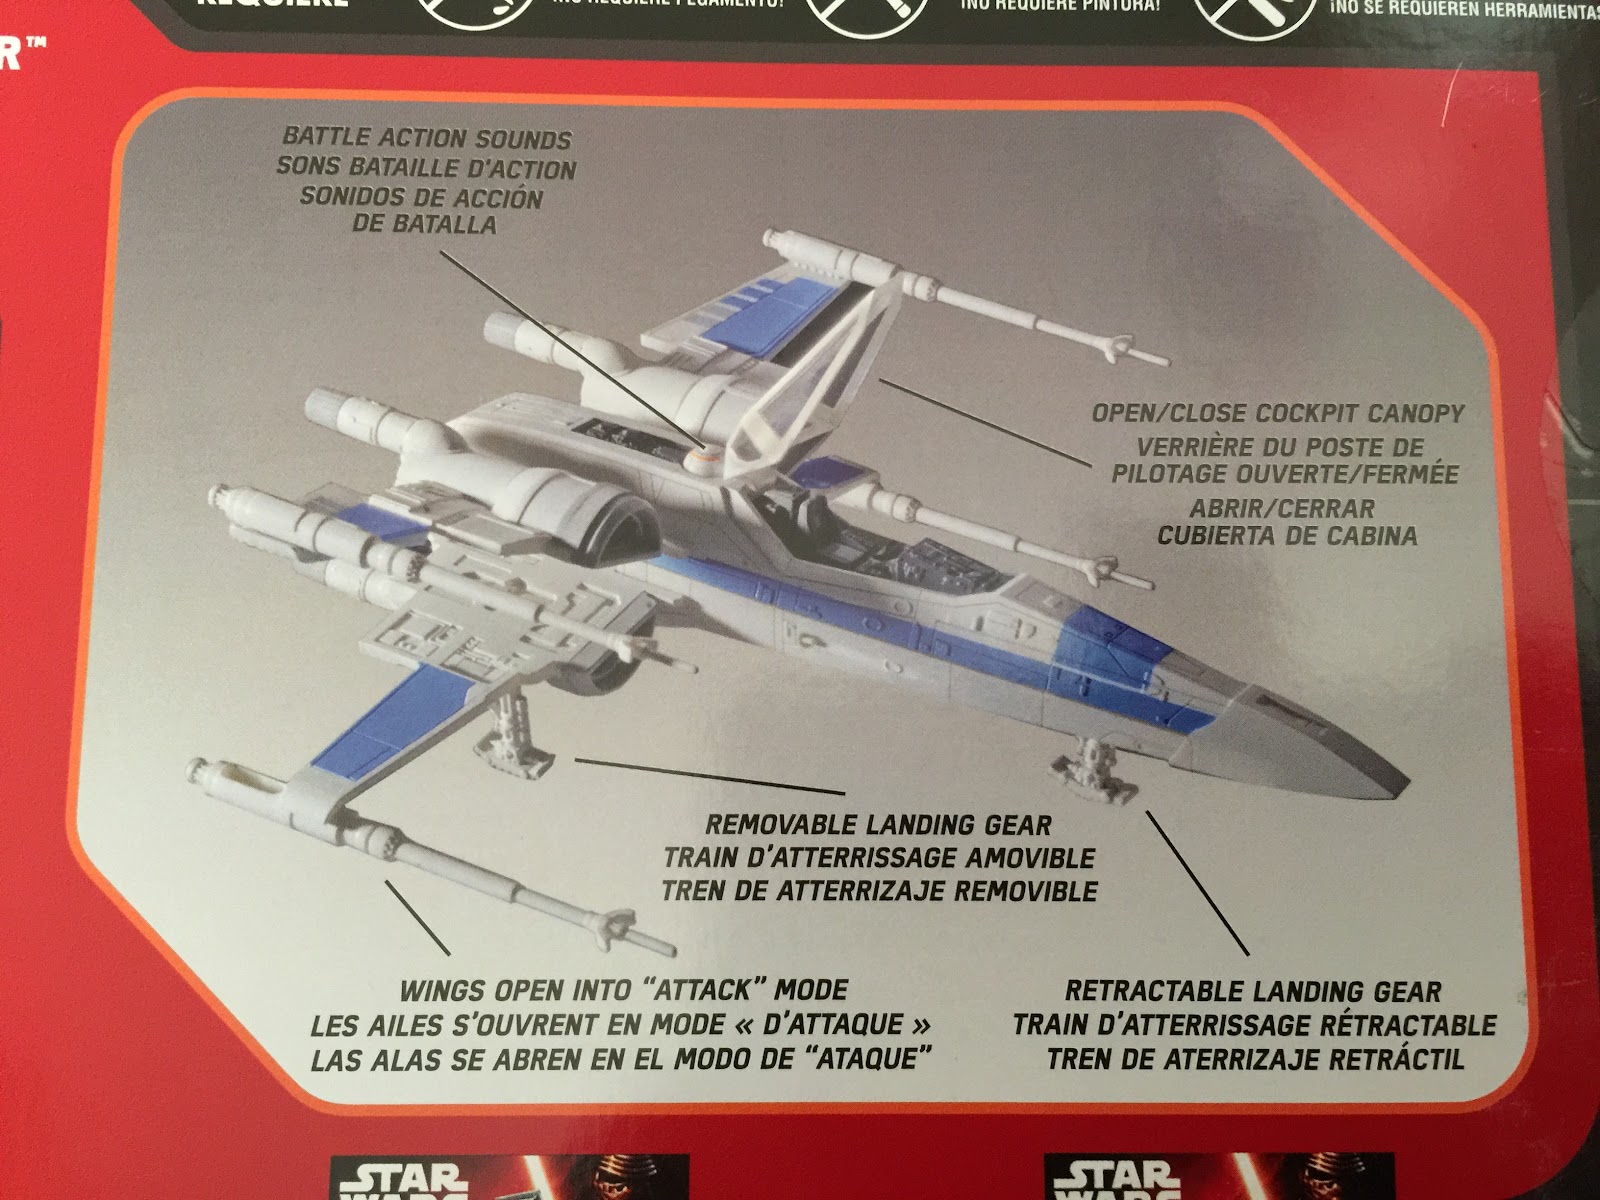
The back contains a lot more information of the kit. The top shows what Skill Level 1 means.
One good thing about Revell is that it shows the parts of the model at the back. We see that there are 18 parts and they are all prepainted.
The features of the kit is presented here. You get moving S-foil wings, front retracting landing gear, removable main landing gears, opening cockpit and sound features. There isn't any stand unfortunately. And no pilot - which is a shame.
This is how the kit is packed inside the box. There are two plastic inserts that hold the pieces separate in the box. It is a good design as the pre-painted parts do not rub against each other when it is being transported. The smaller parts are packed in plastic bags and placed in the recesses of the plastic inserts. An instruction sheet is included.
The instruction is printed on a single sheet of paper - it is after all a fairly simple build. I will be building this with some simple weathering using some fast methods. Here are my tools for weathering this kit as I build it.
This shot was taken after I finished the kit. The weathering was done with:
1) Sharpie Fine Point - Grey: For smearing over large surfaces
2) Sharpie Ultra Fine Point Grey: For smearing over small surfaces
3) Gundam Marker GM02 Grey Fine Line: For fine grey panel lines
4) Copic Marker Multiliner Ink Pen, 0.03mm Tip, Black: For fine black panel lines
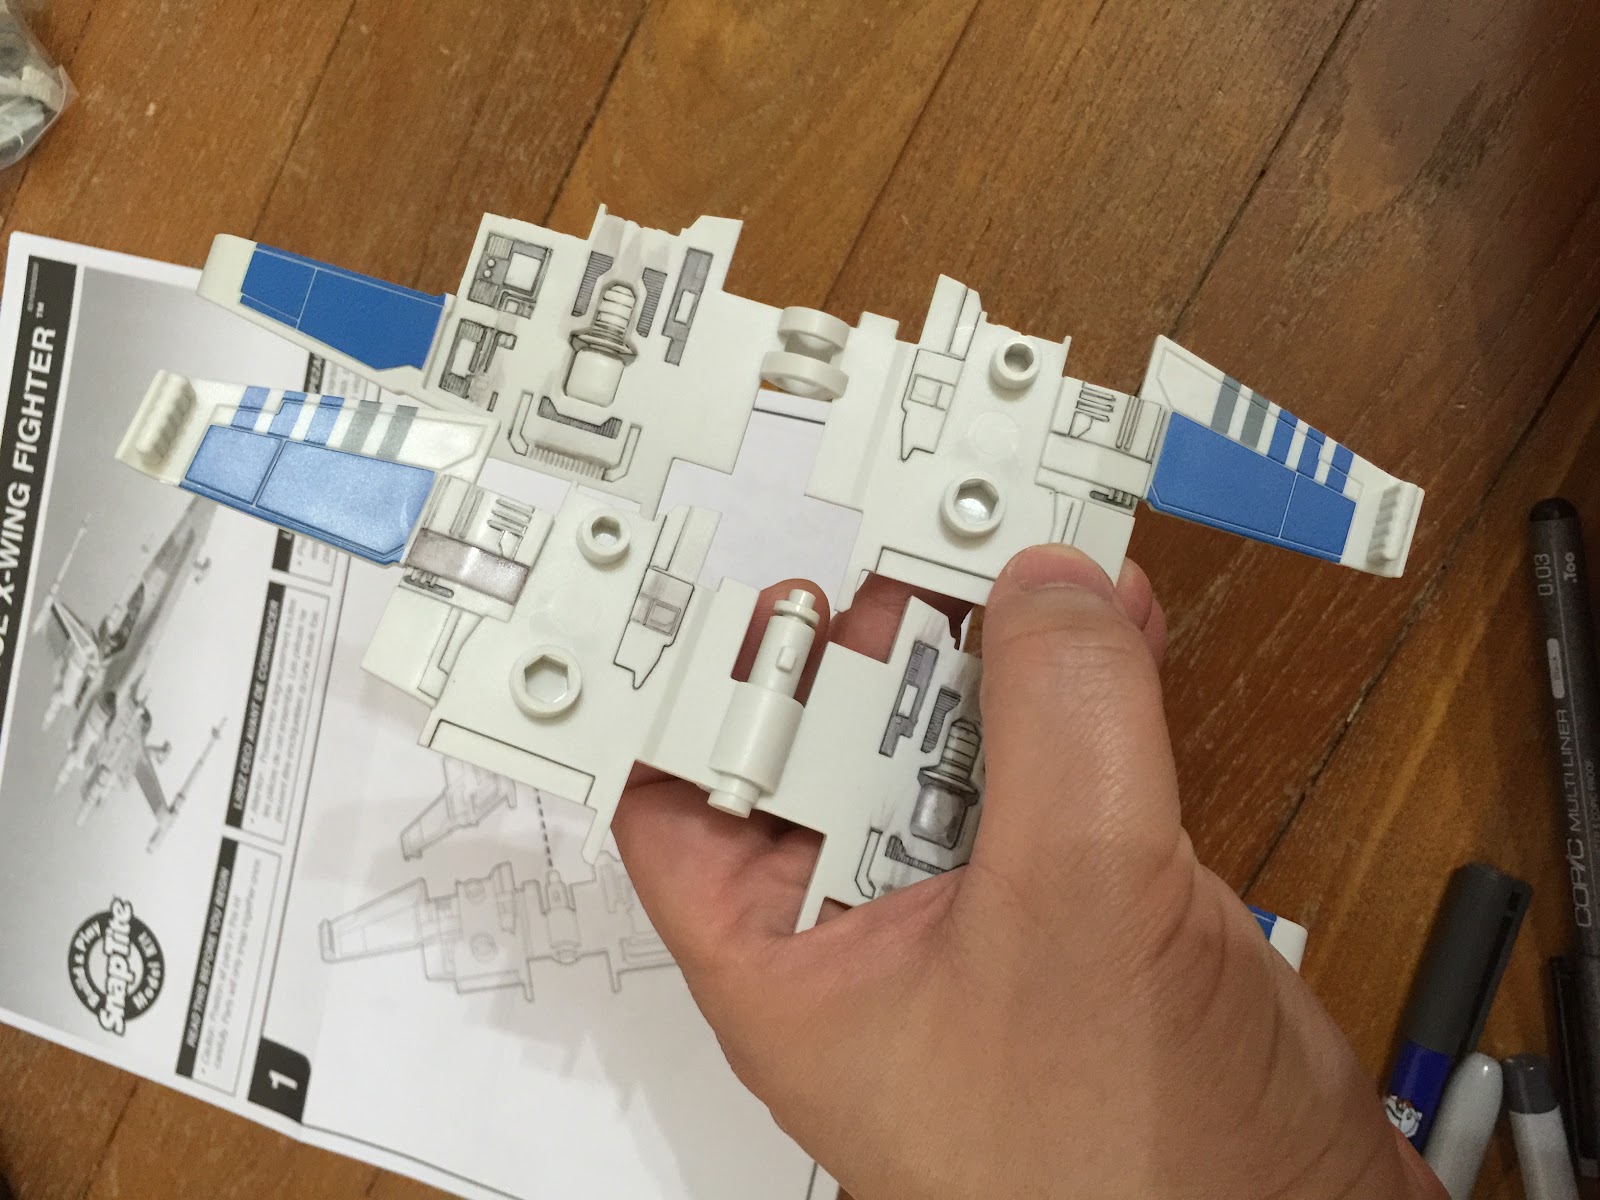
The first parts are the S-Foils. I weathered them before putting them together. Panel line them and randomly shade some grey using the Sharpie markers. Before the Sharpie dries up, use your finders or a piece of cloth and smear it across the surface of the kit in the direction of airflow. This streaks the grey paint across the surface like any real liquid would.
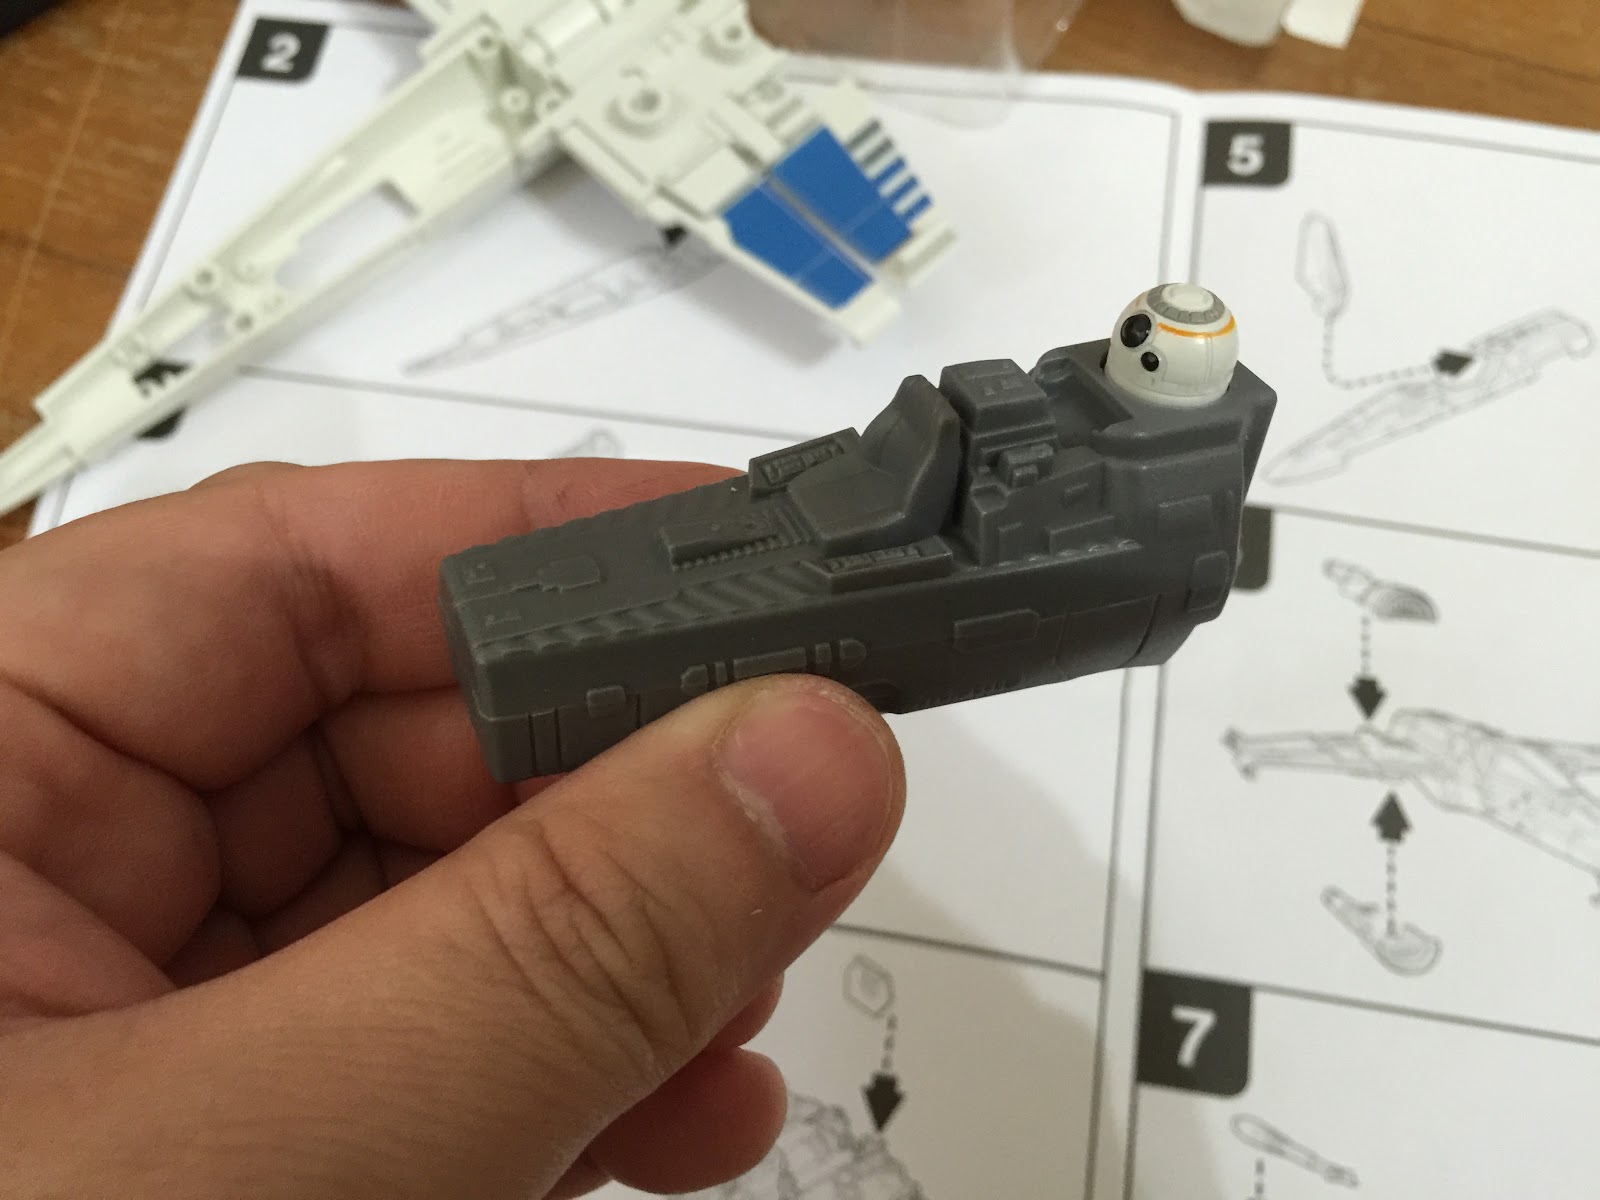
Next up is the bottom fuselage and the cockpit. The cockpit is the sound module and BB-8 is the switch. I used grey to bring out the details of BB-8. As I've mentioned - no pilots.
Take note to put in the landing gears and canopy before closing the fuselage halves. The upper fuselage and cockpit were weathered, panel lined and put to together. The intakes and engines were also weathered and fixed in place. Fairly straightforward, the fit is amazingly good with almost no noticeable gaps and without the need for any glue!
One problem with the Revell SnapTite kit is that the
magnetic flashback suppressors on the four KX12 laser canon were oriented in the wrong direction. The bottom one in the above picture shows the original laser canon. The laser canons are made of a hard pliable plastic. I took a risk and twisted it about 180 to 270 degrees while keeping an eye on the plastic to make sure it did not snap into two. The plastic slowly twisted back and stopped about 90 degrees from the original. After two or three twists to urge it along, the laser canons were oriented correctly. These were slightly weathered and fixed in place.


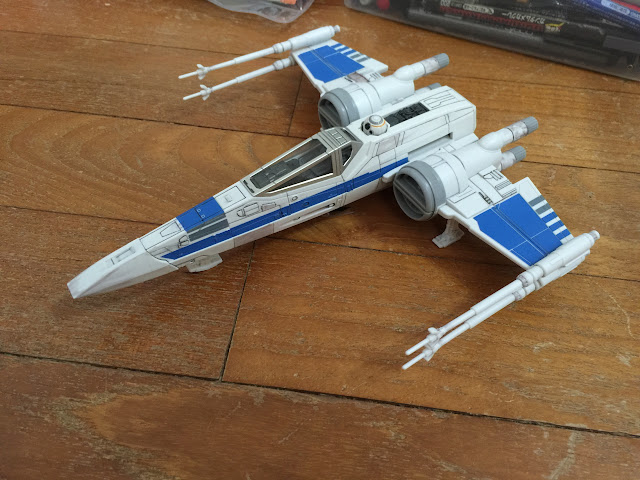


It builds up to quite a nice size. The simple weathering enhances the kit quite a bit - the surface details are not so obvious without the weathering and panel lines. I'm quite satisfied with this kit. Although I would have liked a pilot to be included - if you deploy the S-Foils it is in flight with a pilot! Unless BB-8 is piloting it... This kit is larger than the Bandai 1/72 TFA Resistance X-wing. There is no scale given for the Revell kit but it should be about 1/57 scale (21.8cm long), from what I can guess.
A nice, fun and simple build with sound effects - I think it is worth the price. Took me slightly over an hour or so to complete with the weathering and photo taking. Quite a bit cheaper than the Bandai and larger in size.
Ok, here are the links to the kit and the various weathering tools used in this build:
1) Revell SnapTite Build & Play Star Wars Episode 7 Resistance X-wing Fighter
2) Sharpie Fine Point - Grey: For smearing over large surfaces
3) Sharpie Ultra Fine Point Grey: For smearing over small surfaces
4) Gundam Marker GM02 Grey Fine Line: For fine grey panel lines
5) Copic Marker Multiliner Ink Pen, 0.03mm Tip, Black: For fine black panel lines